Covers W × H × G explained plainly, volume formulas, bulk density, standard sizes by product category, and a step-by-step ordering checklist — for side gusset and flat bottom formats.
Getting gusset bag dimensions wrong is one of the more costly mistakes you can make before a product launch. Undersize the bag and your product either won't fit properly or the top seal won't close cleanly. Oversize it and you're paying for packaging material you don't need, and the bag looks slack and under-filled on shelf, which erodes the premium feel you've worked to create.
Neither problem is difficult to avoid if you know what to measure and how to calculate the volume you actually need. The issue is that most suppliers give you a size chart and leave you to figure out the rest. This guide doesn't do that. We'll walk through every dimension, explain what it means in practice, give you the formulas to work out volume for your specific product, and provide real reference sizes across the most common product categories.
One thing worth saying upfront: these calculations will get you very close, but they're not a substitute for holding a physical sample filled with your actual product. We'll come back to that at the end. For now, let's start with the fundamentals.
About this guide: The dimensions, formulas, and bulk density figures in this article are drawn from our day-to-day experience producing gusset bags for food, pet food, coffee, and supplement brands across the UK, USA, Canada, and EU. We've filled and tested hundreds of bag sizes. Where we give ranges rather than single numbers, that's deliberate — product density varies, and a single figure would mislead more than it helps.
Every gusset bag, whether side gusset or flat bottom, is defined by three measurements. Suppliers call them W, H, and G. Here's what each one actually means.
Width is the measurement across the front panel of the bag when it's lying flat and empty, before any filling. This is what you see as the face of your bag. It's also what your label and print design is sized to. When the bag is filled and standing, this front panel width stays roughly the same because the depth comes from the gussets opening outward, not from the front panel widening.
Height is the total measurement from the bottom seal to the very top of the bag opening, measured before the bag is filled. This is the full panel height. A portion of this height is consumed by the top seal and the zipper if one is present, and by the bottom seal. The usable fill height is always less than the stated H. We'll show you exactly how to account for this in the next section.
Gusset depth is how far each side gusset panel extends inward when the bag is lying flat. This is the single most misunderstood dimension in gusset bag specs. When people ask "how deep is the bag when it's standing?" the answer is G × 2, because there's a gusset on each side. A bag with 80mm gussets has 160mm of internal depth when fully open. That's the measurement that drives volume.
Important: What "Width" Means on a Spec Sheet
The width on a bag specification is always the flat, unfilled front panel. It does not increase when the bag is filled. Depth increases as the gussets open, but width stays constant. If a supplier says a bag is 170mm wide, that's your front panel — it won't suddenly become 200mm because the gussets are 30mm deep on each side.
Here's the formula. It looks a little technical at first glance but it's straightforward once you know the seal allowances to plug in.
Usable Volume = W × (G × 2) × (H − top seal − bottom seal)
All measurements in mm. Result will be in mm³. Divide by 1,000 to get cm³ (which equals mL).
| Closure Type | Deduct from H |
|---|---|
| Top heat seal (no zipper) | 25 to 30mm |
| Top seal with zipper (press-to-close) | 45 to 55mm |
| Top seal with coil zipper | 50 to 60mm |
| Bottom seal (flat bottom or K-seal) | 15 to 20mm |
| Bottom seal (simple fin seal) | 10mm |
Let's say you're looking at a bag specified as 170mm W × 270mm H × 80mm G, with a press-to-close zipper and a flat bottom base.
Step-by-Step Calculation
Effective depth when open: 80mm × 2 = 160mm
Top seal deduction (zipper): 50mm
Bottom seal deduction: 20mm
Effective fill height: 270 − 50 − 20 = 200mm
Theoretical volume: 170 × 160 × 200 = 5,440,000 mm³ = 5,440 mL = 5.44 litres
Fill factor for granules (70%): practical fill = ~3.8 litres
Fill factor for powders (80%): practical fill = ~4.35 litres

The fill factor matters. Bulk solids like coffee beans, kibble, or protein powder never fill a bag to its full geometric volume. Air pockets, irregular particle shapes, and the way material settles all reduce the effective fill. Granules typically fill to 60 to 75% of theoretical volume. Fine powders can reach 70 to 85%. Always apply a fill factor before concluding a bag will work for your product.
Always Request a Physical Sample
Volume calculations are theoretical. The only reliable way to confirm a bag size before committing to a print run is to fill a physical sample with your actual product, seal it, and check that it closes properly, sits stably, and fits your intended shelf space or shipping box. We provide samples before any print run is confirmed.
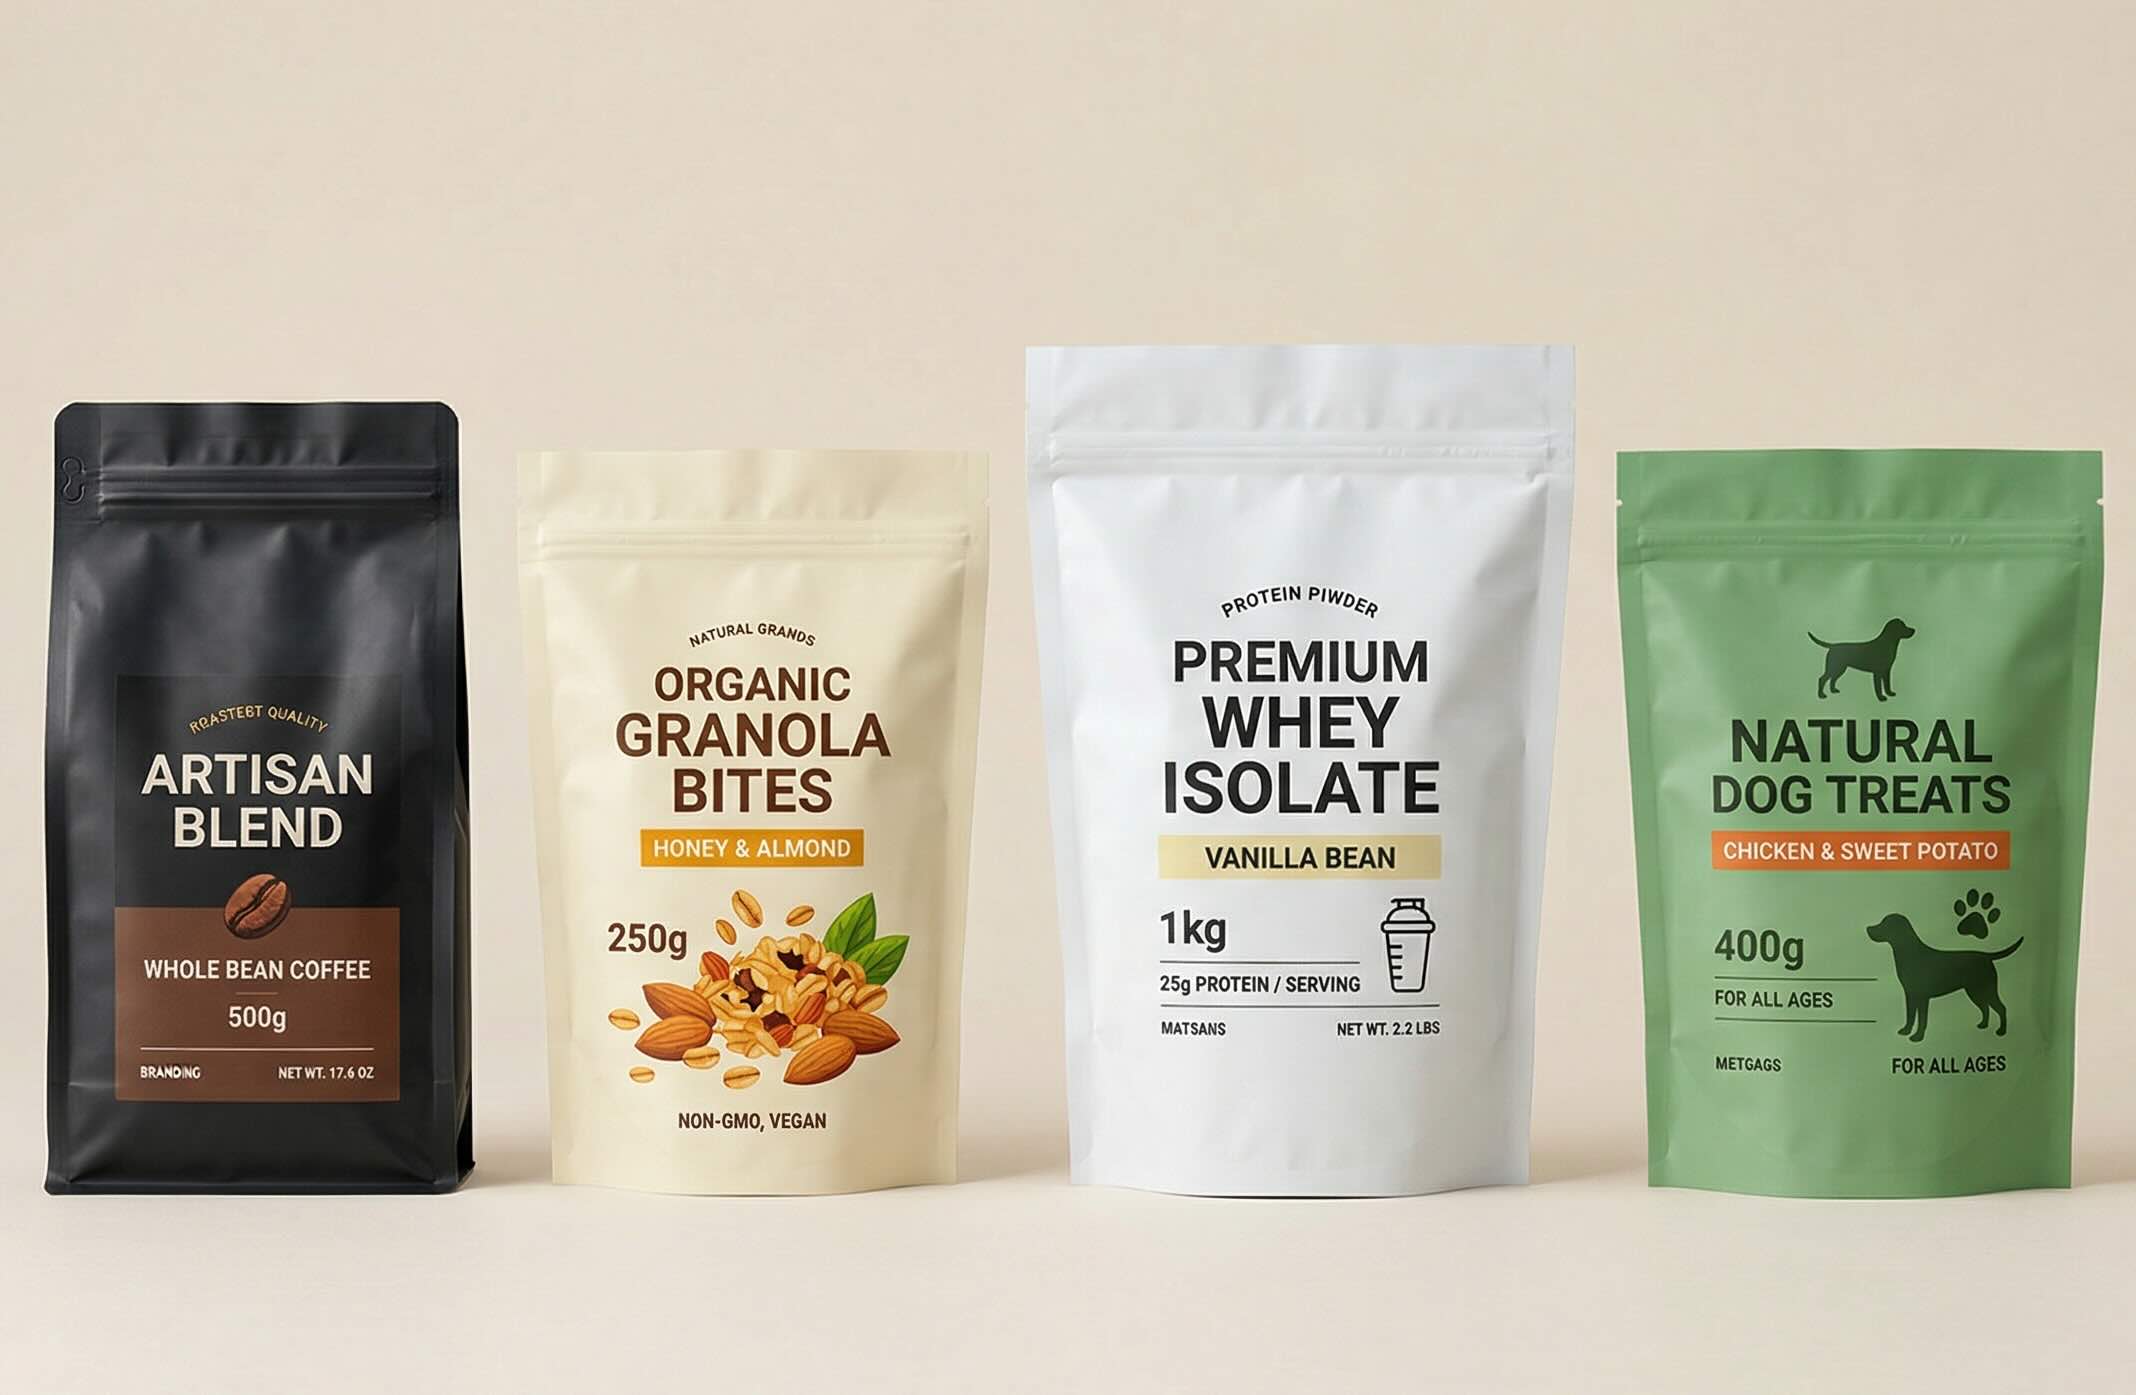
The reference sizes below are the starting points we use most frequently when advising customers. They're based on average product densities within each category. Your product may land slightly differently depending on its specific bulk density, which we'll cover in Section 4.
All dimensions are W × H × G in millimetres.
| Fill Weight | Approx. Dimensions (W × H × G) |
|---|---|
| 500g | 140 × 220 × 60mm |
| 1kg | 160 × 250 × 70mm |
| 2kg | 190 × 300 × 85mm |
| 5kg | 240 × 380 × 110mm |
| 15kg | 380 × 550 × 150mm |
| Fill Weight | Approx. Dimensions (W × H × G) |
|---|---|
| 250g | 130 × 200 × 70mm |
| 500g | 155 × 240 × 85mm |
| 1kg | 185 × 290 × 100mm |
For a detailed breakdown of coffee-specific bag formats, see our guide on gusset pouches for coffee.
| Fill Weight | Approx. Dimensions (W × H × G) |
|---|---|
| 100g | 110 × 180 × 50mm |
| 250g | 140 × 220 × 65mm |
| 500g | 165 × 260 × 80mm |
| Fill Weight | Approx. Dimensions (W × H × G) |
|---|---|
| 500g | 155 × 250 × 85mm |
| 1kg | 185 × 300 × 100mm |
| 2.5kg | 240 × 380 × 120mm |
Important note on density: A 500g bag for puffed corn snacks will be significantly larger than a 500g bag for oat flour. The weights are the same but the volumes are completely different. The tables above assume average densities within each category. If your product is unusually light or heavy for its category, use the bulk density formula in Section 4 instead.
All of these sizes are available in our gusset pouch range, with custom dimensions available on request. If your product falls outside these standard sizes, we'll work out the right dimensions with you before anything goes to print.
Bulk density is the single biggest variable in gusset bag sizing and the one most buyers overlook. It's the measurement of how much a given volume of your product actually weighs, in its natural poured and settled state, not compacted, not aerated. Get this number wrong and no formula will save you.
Measuring your own bulk density takes about two minutes. Fill a container of known volume (a measuring jug works perfectly) with your product as you'd normally pour it, without shaking or compressing. Weigh the contents. Divide the weight in grams by the volume in millilitres. That's your bulk density in g/mL.
| Product | Bulk Density (g/mL) | Notes |
|---|---|---|
| Whole coffee beans | 0.40 to 0.45 | Varies by roast level |
| Ground coffee | 0.35 to 0.40 | Finer grind = lower density |
| Dry dog kibble | 0.30 to 0.50 | Wide range; measure your specific product |
| Protein powder | 0.45 to 0.60 | Whey denser than plant-based |
| Flour | 0.50 to 0.65 | Varies by grain and milling |
| Loose leaf tea | 0.12 to 0.20 | Very light — needs a much larger bag per gram |
| Salt or sugar | 0.80 to 1.00 | Dense — bag can be smaller than expected |
The Formula
Required volume (cm³) = Fill weight (g) ÷ Bulk density (g/mL) ÷ Fill factor
Use 0.70 as your fill factor for granules and kibble. Use 0.78 for most powders. Use 0.65 for very light, airy products like puffed snacks or loose leaf tea.
Worked Example: 250g Specialty Ground Coffee
Bulk density: 0.38 g/mL
Fill factor: 0.72
Required volume: 250 ÷ 0.38 ÷ 0.72 = 914 mL
Suitable bag: 130mm × 200mm × 70mm (theoretical volume ~1,050 cm³ at 87% fill — comfortable with room to seal cleanly)
Once you have your bag dimensions right, these are the closure and hardware specifications you'll need to confirm before your artwork is finalised. Getting these wrong at the artwork stage costs money to redo.
Standard fin seals run 10 to 15mm wide down the back of the bag. A recessed fin seal, where the flange is folded flat against the body rather than standing out, adds no extra width to the bag and gives a neater finish for shelf display. If you're designing for retail, the recessed option is almost always worth specifying.
Zippers are typically positioned 20 to 30mm below the top edge of the bag. Coil zippers sit 4 to 5mm taller than press-to-close zippers at the same position, which is why the deduction from H is slightly higher for coil types. Your artwork needs to account for the zipper band when placing any text or logos near the top of the bag.
The standard euro slot measures 6mm × 28mm and is positioned 15mm from the top edge, centred on the front panel. Before specifying this, check the planogram requirements of any retailer you're selling through. Some retailers specify a different hole size or position, and reprinting because of a 5mm discrepancy is a frustrating and avoidable cost.
A V-notch or slit cut, 4mm deep, placed 3 to 5mm above zipper level on both side seals. Single notch (one side only) is the standard. Double notch on both sides makes the bag easier to open for left and right-handed users alike, which matters in hospitality and foodservice contexts. It's a small detail that affects daily usability.
Standard radius is 10mm at each corner. Rounded corners improve the look and feel of the finished bag significantly, and they also reduce seal failures at sharp corners under pressure. There's no cost implication on our equipment for this option, so it's almost always worth including.

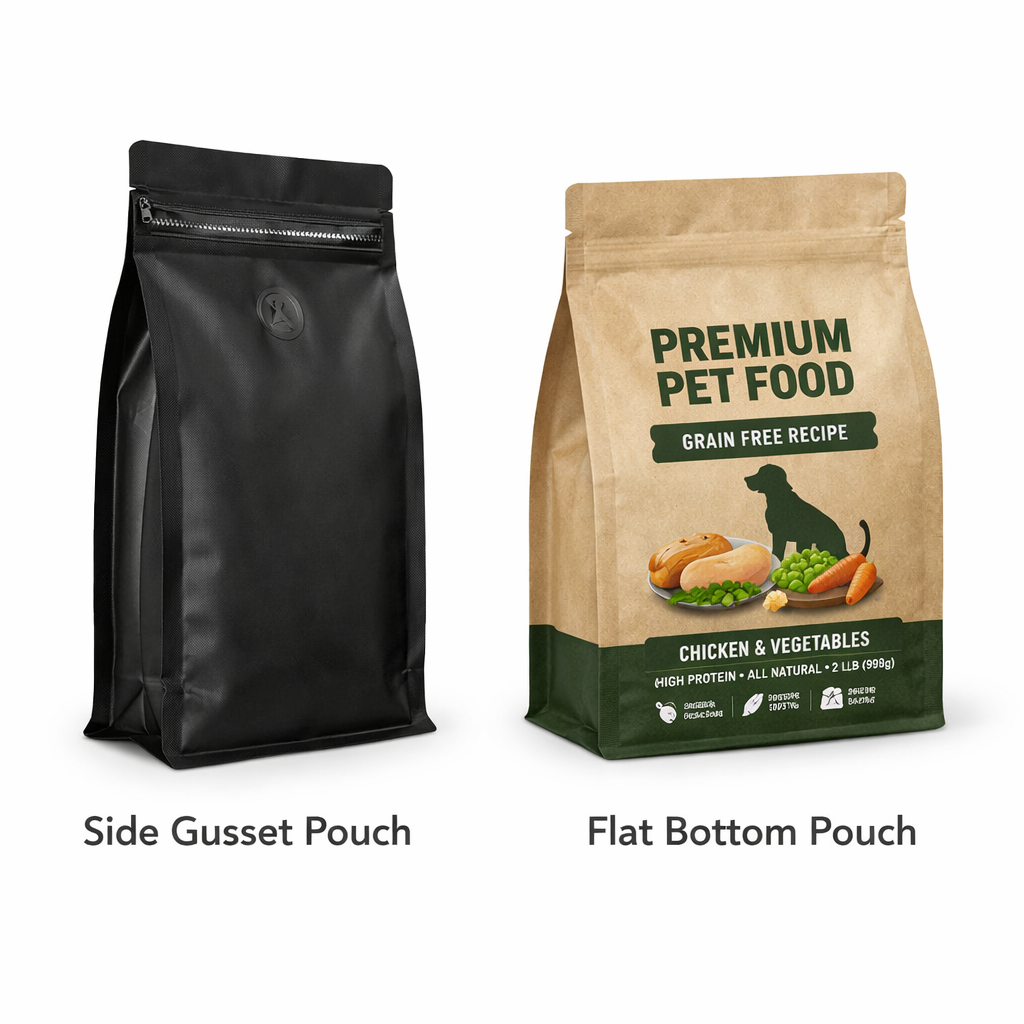
The same W × H × G framework applies to both formats, but the way the dimensions translate into the physical bag differs in a few important ways.
For a side gusset bag, G is the depth of one gusset panel. The total internal depth of the filled bag is G × 2. The standing footprint is W × (G × 2). The base forms naturally from the weight of the product pushing the fin seal flat, rather than being a pre-engineered structure.
For a flat bottom bag, G is the width of the pre-formed base panel. The standing footprint is W × G, which is the same formula but the base is a rigid structure rather than a collapsed fin seal. Because the base is pre-formed, flat bottom bags stand upright even when empty or only partially filled. This is why they're preferred for retail display.
Dimensional Trade-off Summary
For the same fill volume, flat bottom bags tend to be shorter and wider at the base, giving a more stable, product-like silhouette. Side gusset bags tend to be taller and narrower, which suits shelf formats where bags stand shoulder-to-shoulder. Flat bottom requires more complex tooling. Side gusset is lower cost to produce, especially for multi-SKU ranges where you're managing several sizes simultaneously.
Flat bottom is almost always the stronger choice for retail shelf display. Side gusset is better for mail-order subscriptions, high-volume formats, and situations where packing efficiency matters as much as visual presence.
Here's the process we walk customers through, in order. Following these steps before any artwork is submitted or any print run is confirmed saves time, money, and the frustration of discovering a sizing issue after the fact.
Measure your product's bulk density. Pour your product into a measuring jug, weigh it, and divide grams by millilitres. Do this at room temperature with a product sample that represents your normal fill (not freshly processed if the texture changes on cooling).
Calculate your required volume using the formula in Section 4. Apply the appropriate fill factor for your product type. Note the result in cm³ or mL.
Choose your format: side gusset or flat bottom. Refer to Section 6 if you're unsure. The key questions are: does the bag need to stand unsupported on a retail shelf? And does packing efficiency for mail-order matter?
Add your seal and closure allowances from Section 5. Confirm whether you need a zipper, tin tie, or heat seal only. Confirm zipper type if applicable. Note whether you need a hang hole and check the retailer spec before finalising its position.
Request a physical sample in your calculated size before approving any artwork. Fill it with your actual product. Seal it. Stand it on the shelf space it will occupy. Put it in the shipping box or mailer it will travel in. Only approve the size when it passes this test.
Confirm your artwork template matches the approved sample dimensions. Front panel width, total height, gusset panel area, zipper band position, and hang hole location all need to correspond exactly to the confirmed bag size.
See It in Action
If you'd like to see how different gusset bag sizes look filled and standing, we walk through real bag samples across product categories on our YouTube channel. Visit XWPak on YouTube for product walkthroughs and packaging guides before you order.
Need Help Getting the Size Right?
If you'd like help calculating the right gusset bag size for your product, our technical team can advise. Browse our custom gusset bag sizes and get in touch. We produce both standard and fully custom dimensions, with samples available before any print run is confirmed.
Browse Gusset Bag OptionsGusset bag sizing isn't complicated once you understand what each dimension actually controls. Width sets your print canvas. Height gives you the fill column. Gusset depth creates the volume. Bulk density tells you how much of that volume your product will actually occupy. Everything else, the seal allowances, zipper specs, corner radius, hang holes, is just confirming the details before they go to print.
The part that trips most buyers up is skipping the physical sample stage. The formulas are there to get you to the right ballpark confidently. The sample is what confirms the ballpark is correct for your specific product. These are two separate steps, and both matter.
We stock food-grade gusset bags across the UK, USA, Canada, and EU with low minimum order quantities and same-day production on confirmed orders. Custom dimensions are available across both side gusset and flat bottom formats. If you've worked through the calculations above and you're ready to find the right bag for your product, we're here to help.